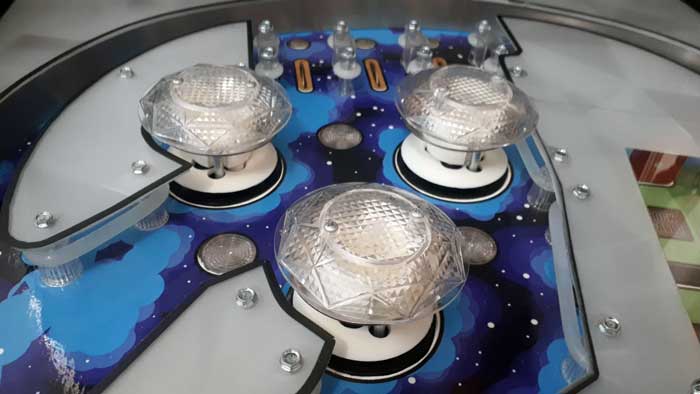
Pop Bumpers
Related Config File Sections:
Popbumpers are configured as autofire_coils in MPF.
Hardware
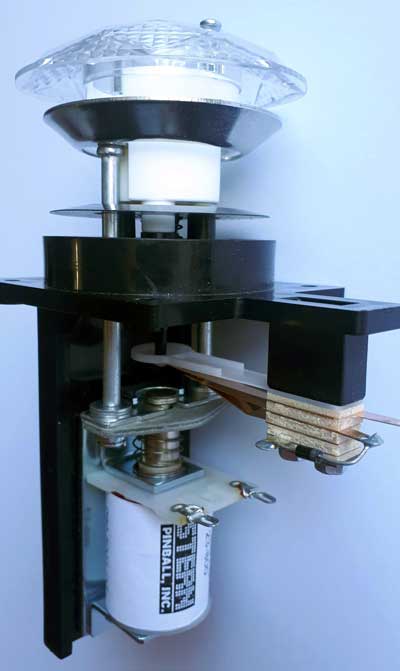
Pop bumpers are made of three elements relevant for MPF:
- A
blade switch </mechs/switches/mechanical_switches>to notice balls - A #444 or #249 bulb for light shows
- A coil to push the ball away.
There areother parts, like the pop bumper body, all parts need to match in size and dimension of course. The complete assembly consists of parts above the playfield and some parts below the playfield. Above the playfield the following parts need to be assembled in the following order:
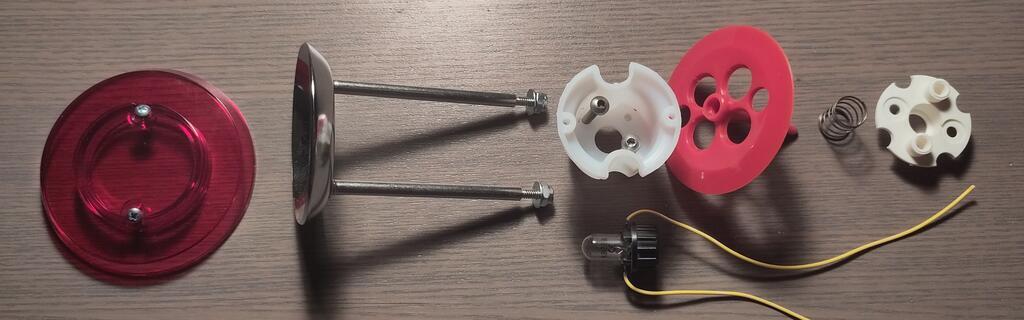
A few notes which might help to assemble the parts above the playfield:
- The nuts on the rod for the metal ring don't use a metric threading. To fasten them a 8mm wrench is good, but don't try to use a metric nut.
- The two screws to mount the cap are of size 3,0 x 12 mm, use pan head screws. When you screw the parts multiple times together turn the screw first counter clockwise to use exactly the same thread cut by the screw from the previous assembly. Otherwise the body will be worn out after a while.
- The two screws to mount the body to the board are of size 3,5 x 25mm, use pan head screws.
- You need a 17mm Fostner drill to drill hole for the base.
- You need a 8mm drill for the metal ring rods.
Below the playfield the parts needed look like this:
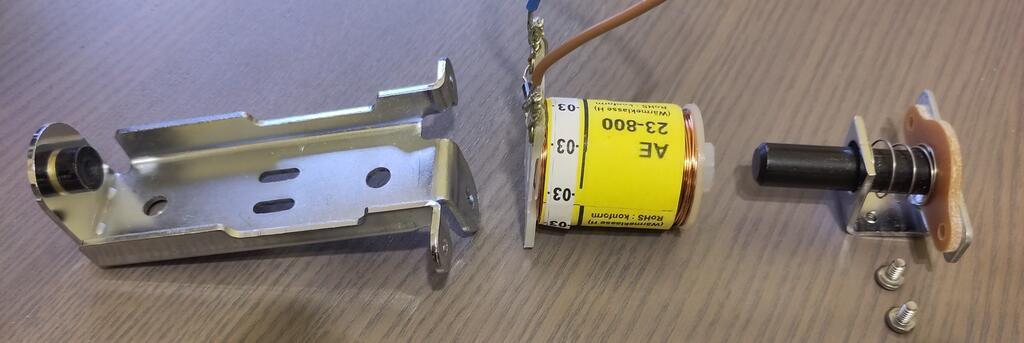
A few notes which might help to assemble the parts below the playfield:
- The coil specification depends on the voltage you use and the strength you would like to have. Probably a trial and error approach is needed to find the coil you want.
- The piece with the spring on the right hand side consists of 5 parts: yoke metal, yoke fiber, spring, metal bracket (plunger bracket), plunger
- The screws are again not metric
- If your coil has a fly back diode make sure to connect it the right way around. The ring of the diode has to point to positive voltage. You might not have a diode and you might not need one (if your controller board has that already built in)
Last but not least below the playfield you need a leaf switch:
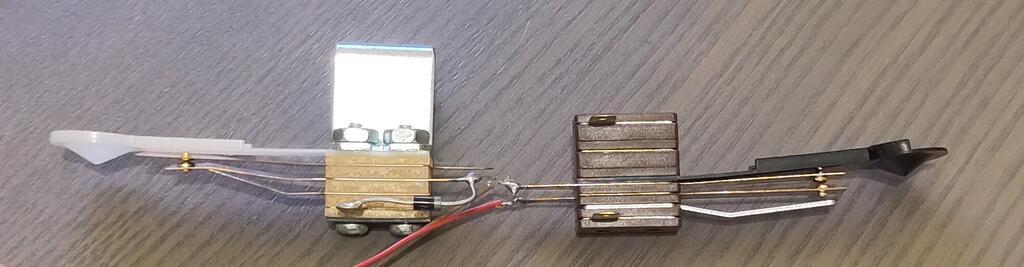
The leaf switch is closed by the pin of the pop bumper skirt when the skirt pressed down by the ball. It is important to adjust it very precisely. Again a few notes:
- A diode on the switch is needed if you use a matrix input, for direct inputs no diode is needed
- You need the switch and a mounting bracket (like the left leaf switch on the picture above)
- The switches come in different heights, make sure to get the height you need. (compare the two variations on the picture)
- Try to get a translucent leaf that helps to adjust it later since the skirt's pin can be seen from below
When mounting the pop bumpers you have to drill quite a few holes for homebrew machine, having a stencil might be helpful.
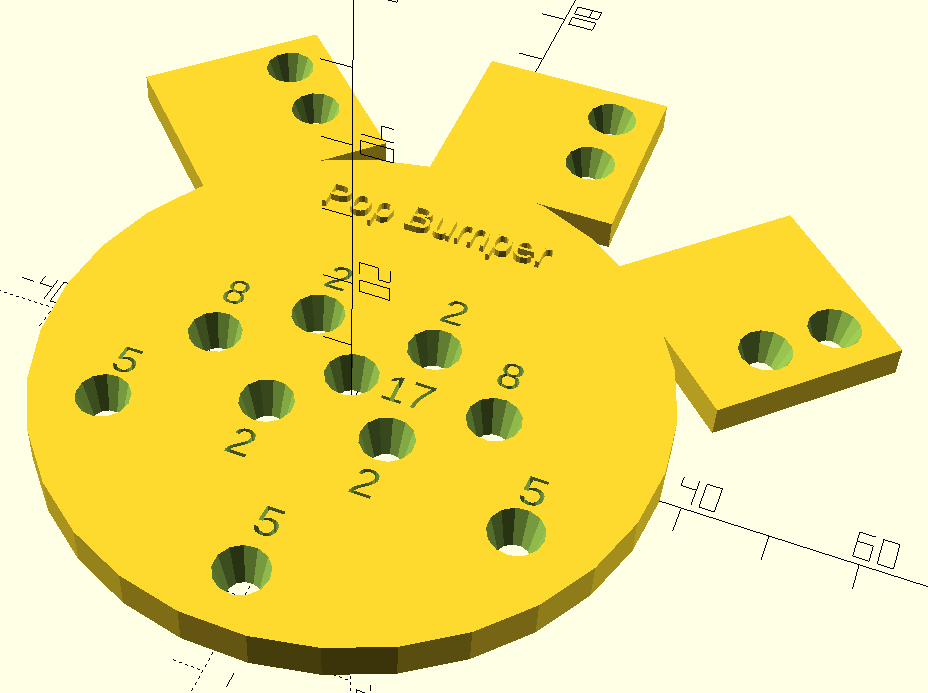
The above stencil has been created with openSCAD. Feel free to use the scad file or the stl file for your own purposes.
Part numbers:
- Older one part plastic bumpers: 500-5227-00, AS-2999 (Turbo bumpers)
- Modern bumpers: 515-6459-04/A-9415 and B-9414
Config
This is an example:
switches:
  s_popbumper_left:
    number: 7                 # depends on your platform
coils:
  c_popbumper_left:
    number: 4                 # depends on your platform
    default_pulse_ms: 23      # tune this for your machine
lights:
  l_popbumper_left:
    number: 13                # depends on your platform
    subtype: matrix           # might be differnt
autofire_coils:
  ac_popbumper_left:
    coil: c_popbumper_left
    switch: s_popbumper_left
Adjust default_pulse_ms and default_pulse_power in your coil to
control the strength and sound of your pop bumpers.
Related How To guides:
Something missing or wrong? You can fix it!
This website is edited by people like you! Is something wrong or missing? Is something out of date, or can you explain it better?
Please help us! You can fix it yourself and be an official "open source" contributor!
It's easy! See our Beginner's guide to editing the docs.
Page navigation via the keyboard: < >
You can navigate this site via the keyboard. There are two modes:
General navigation, when search is not focused:
- F , S , / : open search dialog
- P , , : go to previous page
- N , . : go to next page
While using the search function:
- Down , Up : select next / previous result
- Esc , Tab : close search
- Enter : go to highlighted page in the results